Showing posts with label onions. Show all posts

Wednesday 18 September 2013

imam bayaldi - turkish stuffed aubergines in olive oil


Any dish named after a tale involving an Ottoman cleric going weak at the knees due to its outstanding flavour is doing pretty well in the self-promotion department. Which is the case for imam bayaldi, literally translating from Turkish as ‘the imam swooned’. A physical reaction I often experience myself when consuming something great, so I totally get this guy.

Aubergine is one of the most revered ingredients across the Middle East, and this popular zeytinyağlı (olive oil) dish is one of the favourite ways to eat it in Turkey. It pulls no punches when it comes to the inclusion of the light green nectar; it is unashamedly oily and all the superior for it. 

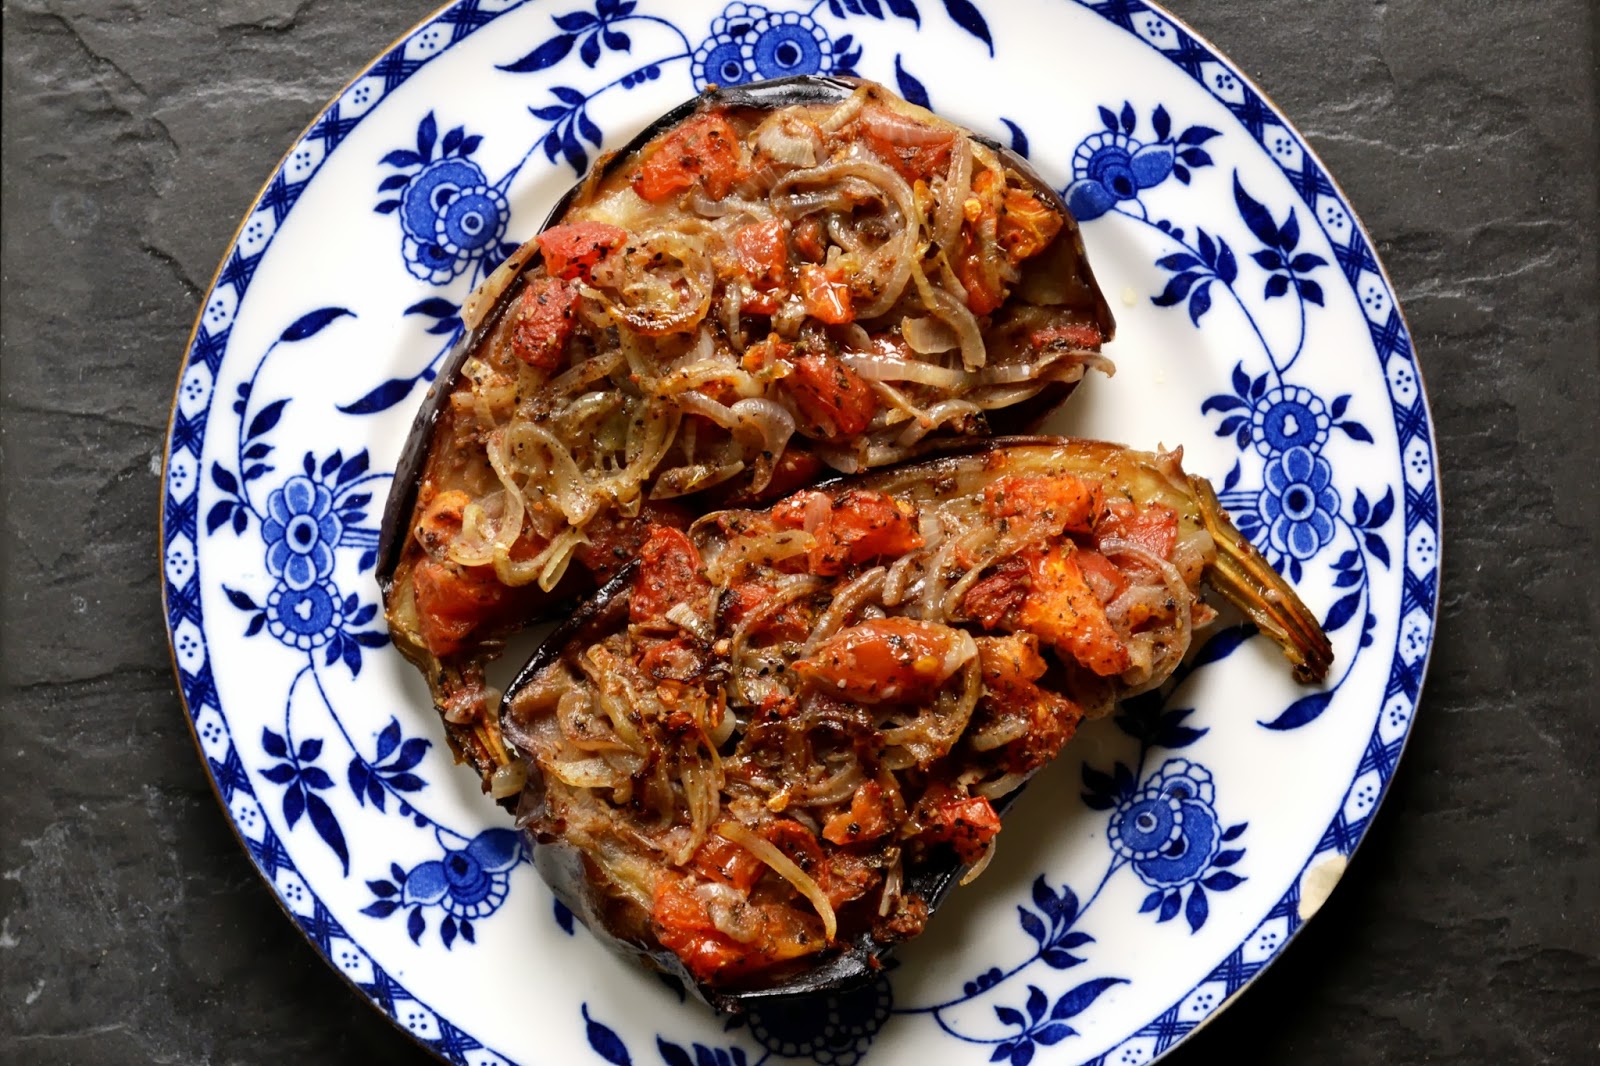
Consisting of braised aubergines stuffed with an onion, tomato, garlic and herb mix and cooked in olive oil, its form breaks down to that characteristic and incredibly flavoured oily mush that this glossy purple fruit does so well. Different nuances of this style of eating aubergine can be found across Turkey and the Middle East and is almost unanimously adored by all who reside there; it's surely the best way to consume these tear-dropped treats.


On a recent trip to Istanbul (see my 10 Things to Eat in Istanbul post), I actually had this dish for the first time (how I had managed to avoid it until then I'm note entirely sure) and indulged in a bit of swooning myself. It was however sitting in a pool of olive oil and to conserve all of our arteries, I've used quite a bit less in my recipe than the purists would be happy to let slide, I suspect.
Imam bayaldi is normally eaten as a mezze (starter) and traditionally would accompany other small dishes to whet the appetite prior to the main meal. Therefore, half an aubergine is considered as one portion here. Should you wish for it to take soul centre stage, then accompany it with some quality bread to help mop up any remaining oily goodness.

Imam Bayaldi

Makes 6 starter portions

3 medium aubergines
6 small tomatoes
3 small white onions
4 cloves of garlic
2 tsp sumac
2 tsp dried mint
2 tbsp lemon juice
Extra virgin olive oil (a fair amount)
Sea salt (a fair amount)
Fresh flat leafed parsley (not included in these photos as I didn't have any, but do get it)

Wash the aubergines and peel alternating strips of the skin with about an inch thickness. Put them in a bowl, coat with sea salt and leave for 20-30 mins. The salt will draw out the bitter liquid from the fruit, and the stripes allow the aubergine to absorb more flavour during cooking.


In the meantime, make your stuffing mix. First you want to peel the tomatoes; the easiest way to do this is to lightly score a cross at one end of each tomato, plunge it into a bowl of freshly boiled water for a few seconds, and when you take them out the skin will easily peel away from the cross.

Finely slice the onions and grate the garlic and gently fry these in a very generous glug of the olive oil until they begin to go translucent. When cooked, put these in a bowl and combine with the roughly chopped skinned tomatoes, sumac, dried mint, lemon juice, salt and pepper and a good glug of extra virgin olive oil. Combine thoroughly. If you do have the parsley, roughly chop a good handful and combine with this mix. Set aside.

When your aubergines have had their 20 - 30 minutes simply wipe away the salt with kitchen paper. Peel off the little green bits around the base of the stalk. Slice the aubergines in half lengthways and try to slice right through the stem so half a stem remains on each portion. On the fleshy sides, cut a cross but do not go all the way through to the skin, and stop before you reach the edges of the aubergine.


In a couple of large pans, coat the bases with a very generous glug of olive oil and when it's hot, add the aubergines. You want to cook all sides so they obtain colour and begin to go soft. You may need to add more olive oil if it all gets absorbed.

Preheat the oven to 180C (fan).


Pack your aubergine halves into an oven dish, fleshy side up. Stuff each portion with some of the mix - try to push it right into the crosses. Pile any remaining mix on top of them. Drizzle with a further generous glug of olive oil. Add a splash of water to the base of the oven dish, and cover tightly with kitchen foil. Cook in the oven for 1hr 15mins to 1hr 30mins - it really depends on how soft you like your aubergine flesh.

When cooked, remove from the oven and allow to cool. This dish should be eaten at room temperature, so if you keep it in the fridge do take it out before hand to warm up prior to serving. Eat with other mezze dishes (perhaps some dolma), with quality warm bread and perhaps a little strained yoghurt.

Afiyet olsun.


Sunday 2 December 2012

Edible Christmas Gifts - I

I get a lot of satisfaction from making or creating things. It’s part of the reason I enjoy cooking – the idea of concocting a dish completely different from its component parts which on their own would be far less exciting, is a big draw. Alongside the glaring fact that I like to eat.

It’s also why I enjoy gardening, particularly fruit and vegetables - the Spring-time ritual of applying an inanimate seed to some dirt, adding water, giving it light and time and that resulting in the beautiful slow motion animation of germination, growth, bud, bloom and the setting of fruit is immensely gratifying. Not to mention the produce is quite handy for my first point.

Then there are textiles and sewing. I can’t walk into a shop and look at a cushion without giving it the once over and proudly exclaiming ‘£25?! I could make that myself’ (not always the case, alas). 

And so I put my money where my mouth is, and I attempt soft furnishings. I have so far been successful in making several cushion covers (one even from an old unwanted cardigan); a pair of curtains for one window in the main bedroom (lined, I might add) – the second window is still patiently waiting to be dressed; personalised Christmas stockings for Matt and I; and I am about 9 patches into a kingsize patchwork quilt (that project is a labour of love). Knowing I can make things very similar to those priced quite highly in the shops just by trying it out and watching a few handy youtube videos, has a huge satisfaction factor. Making things, being creative, working with my hands – all activities that appeal to me.


And so I see Christmas as the green light to get out the craft kit, get the apron on, and start cooking up some edible homemade gifts. What’s particularly appealing about this is I can incorporate my love of cooking with my penchant for craftiness in their packaging and decoration. These are little stocking fillers to give to friends and colleagues on the last few days at work before breaking up for the holidays, and to leave a little something with family when squeezing in fleeting visits on Boxing Day.

The sneaky tip over into December marks the time to start on the chutney. They need about 1 month to develop their flavour before being consumed, so now is a good time to get them done and ticked off the list.

This is a recipe I’ve used for the past couple of years now and it goes down a treat.

Caramelised red onion chutney

This goes incredibly well with strong cheeses and biscuits – get your fill in before ‘normal eating’ returns post festive period. Very simple to make.
Fills about 5 small-medium jars

Preparation

You will need five small to medium glass jars with their metal lids. You can either purchase kilner jars specifically, or if you happen to keep jars when you finish with their contents, use those. Screw tops are preferable to flip tops as the seal is stronger. The jars I used were smaller than jam jars – small caper jars, jars with mustard, small honey jars etc.

These jars will need to be sterilised and need to be filled when both the jars and the chutney are still hot. You can either put them through a cycle in the dishwasher and time it so that your chutney is ready once the cycle is complete. Or you can put the jars (lids off) in an oven at 180C for at least 20 minutes. The heat from both of these methods will kill of any germs that could contaminate your delicious chutney contents. Hand washing them in hot water will not suffice for sterilisation, but be sure to do this anyway once you’ve finished with their original contents.


10 large red onions
1 large red chilli
2 bay leaves
Olive oil
200g brown sugar
150ml balsamic vinegar
150ml red wine vinegar


Slice your onions very finely. You want to be sure you first slice off enough top and enough of the root to get rid of any parts of the onion that are tougher. Then remove two layers of the outer onion after the initial paper layer (this is why you want large ones to begin with). It’s the remainder that you want to slice up. Slice your chilli in half, remove the seeds, and chop the rest of it finely.

Tip The easiest and quickest way to slice this volume of onions with a consistent thickness is with a v-slicer or mandoline slicer. This is the one I use – worth putting on your Christmas wish list if you don’t already have one. It can of course be sliced with a knife, it will just take a bit longer. 
 If you are using a v-slicer or mandoline slicer, be sure to slice the onion in the holder in half with a knife first so the slices don’t come out as rings, otherwise they’ll be too long to spoon out of your jar.

Add your onion, bay leaves and chilli to a large pan with some olive oil and cook over a low heat with a lid on for a good 20-30 minutes, or until they soften and become sticky and a bit stringy. Add a sprinkle of salt to help draw out the liquid. I find a wok is very  useful for this as it holds a large volume and distributes the heat to more of the onions than a large saucepan would.


Once the onions are soft and sticky, add the sugar and vinegars and simmer for 30 minutes or so with the lid off, until almost all of the liquid has disappeared and the chutney is thick and dark. Be sure to give it a stir now and again.

Pour the chutney into your hot, sterilised jars – try to not let any touch the tops of the jar where the lid screws on. If you do, wipe with clean kitchen paper. Push the contents down so any large air pockets are filled. Put your lids on and allow to cool. After a while, push the pop button of your lid in if it has one – it should stay down. This happens because the air in the jars has contracted whilst cooling down. When the lid is first opened after this, the button should pop indicating freshness as it would have done with its original contents.

Keep your jars in a cool dark place for the chutney to develop their flavours for at least a month before consuming.

Et voila – my first set of Christmas stocking fillers complete.

There is then the matter of decorating these little gifts. You can let your creative juices run free here, using up any scrap bits of crafty stuff you might have lying around. I plan furnish mine quite simply. I will top the jars with a square of material – I have some red and green gingham along with some festive looking check left over from last year. 

They will be secured with basic brown jute string tied around the neck of the jar, and from them needs to hang a label. I have a wad of brown paper that I have saved from various packaging received in parcels throughout the year (did I also mention I like to recycle and re-use?) and I’m almost certain I can turn these into neat looking labels. Turns out after a bit of origami style experimenting, some well concealed cellotape and a hole-punch, it’s actually fairly easy. If you’d like to replicate, I’ve included the instructions below.


Take a rough square of your chosen paper and fold it about two thirds of the way up. The height you are left with will be the total length of your label.


Fold the top two corners down to the centre until they meet.


Fold the two edges in to create a label shape and secure with a bit of sticky tape folded over into a loop so it's sticky on both sides - this way you can conceal the tape.


Turn it over and you have a label. Use a hole punch to create a hole for the string. Repeat for as many as you'll need.

I hope these will go down a treat for the lucky folk receiving them.
Don't forget to make an extra jar for yourself.

Alfiyet olsun.

print button