Showing posts with label butter. Show all posts

Saturday, 28 September 2013

beetroot and pecan brownies - recipe


Putting a vegetable in a cake is nothing revolutionary. Naturally sweet root vegetables add lightness and aid moisture retention during cooking, and who doesn’t like a fat slice of carrot cake. Hell, I’ve even made a parsnip cake in my time. And as the nights draw in and we up our duvet tog counts, this time of year demands sustenance to satisfy the sweet tooth in all of us. The addition of beetroot to these brownies provides an earthy undercurrent that works so well with dark chocolate. Throw in toasted nuts of your choice for added texture and you have a perfect accompaniment to a vat of tea.


The recipe for these are based on Hugh Fearnley-Whittingstal's from his book Every Day, with a few changes.

Beetroot and pecan brownies

Makes about 20

250g fresh beetroot

250g unsalted butter, cut into cubes
150g dark chocolate, broken into pieces (I used Lindt Excellence 70% Cocoa Bar)
100g dark chocolate with a touch of sea salt, broken into pieces (I used Lindt Excellence A Touch of Sea Salt)
3 medium eggs
250g golden caster sugar
A pinch of sea salt
150g plain flour
2 tsp baking powder
50g toasted pecans, roughly chopped

First prepare your beetroot. Cut away the stalks but leave the beetroots whole and boil until tender. Drain and allow to cool. When cool enough to handle, use a teaspoon to scrape off the skin which should come away easily. Finely grate the beetroot and set aside - I used a hard cheese grater.

Grease a shallow baking tin, approximately 20 x 25cm, and line the base with baking parchment. If you prefer, you can grease the base with butter and dust with cocoa powder which will also prevent the brownies from sticking.

Put the butter and chocolate in a heatproof bowl and melt. I do so in a microwave for about 30s at a time, giving the contents a good stir each time. When almost everything has melted, keep the microwave times shorter, say 10s or so. If you overheat it the chocolate will split.


Pre-heat the oven to 180°C/Gas Mark 4.

Whisk the eggs and sugar together in a large bowl until thick and pale and then beat in the melted chocolate and butter until smooth. 

Combine the salt, baking powder and flour, sift them over the chocolate mixture, then gently fold in with a large metal spoon. Now fold in the grated beetroot and pecans – be careful not to over-mix or it will make the brownies tough.

Pour the mixture into the prepared tin and smooth the top with a spatula. Bake for around 1hr or until they are done. When a knife or skewer is inserted in the centre it should come out with a few moist crumbs clinging to it. Don’t be tempted to overcook them or they will be dry. 


Tip: If the batter rises like a cake sponge, take the back of a ladle and compress it down - you’ll still obtain the familiar brownie appearance.

Remove the tin from the oven and leave on a wire rack to cool before cutting into squares. 

Keep these airtight and they’ll remain moist and wonderful for a good week. Enjoy with a hot drink and a comfortable armchair.

Afiyet olsun.

Saturday, 19 January 2013

Brioche


Is there anyone on the planet that doesn't like brioche? The answer to that is of course, no. And if you haven't had the opportunity to try it yet, I suggest you get acquainted with immediate effect and some urgency - a second longer without its existence in your life is a second too long. I suspect there are only a few things that encapsulate the very essence of pleasure more than eating freshly baked brioche still warm from the oven with a slathering of really good jam. Which is what I just did, and it was excellent. So excellent, that this blog post has bumped to the top of the queue of my mini back-log and Heston's Dinner is just going to have to wait. This bread laughs in the face of his Michelin star.

For those who may not be familiar with this bread, it is classically French and slightly sweet. The dough is enriched with eggs and a whole packet of butter. Well, it is French. The best way to eat this is warm with some excellent conserve and a coffee for a weekend breakfast or brunch - oh sod it, make it both.

Brioche

Makes 1 large loaf

This dough should be made the night before and left in the fridge to firm before shaping and proving - excellent if you want to get ahead. This recipe is from Paul Hollywood's How to Bake.

500g strong white bread flour, plus extra for dusting
7g salt
50g caster sugar
10g instant yeast
140ml warm full-fat milk
5 medium eggs
250g unsalted softened butter, plus extra for greasing.

Tip This recipe does really require a mixer due to the eggs and butter that are used - the dough becomes very wet and sticky. However, you could always do it by hand - it will just take quite a bit longer. The technique by hand will be very similar to that used in my panettone post - always good to try out if you haven't before for your hands to get familiar with heavily enriched doughs. However, if you do have a mixer, then this recipe is incredibly simple.


Tip I suggest purchasing some really good quality butter for this. It makes up a large proportion of the end result and will heavily influence the taste of your bread. Seeing as it's a French recipe, I've stuck with the French butter President.

Tip The dried active yeast I use is Allisons and comes in a sealable pot so it's easy to measure out the amount you need, unlike the individual sachets you can get which are usually 7g each.

Put the flour into the bowl of your mixer fitted with a dough hook. Add the salt and sugar to one side of the bowl and the yeast to the other.


And the milk and eggs (the eggs should be at room temperature) and mix on a slow speed for 2 minutes, then on a medium speed for another 8 minutes until you have a soft, glossy, elastic dough. Add the softened butter a bit at a time and continue to mix for a further 5 minutes, scraping down the bowl periodically to ensure all of the butter is thoroughly incorporated. The dough will be very soft.

Tip the dough into a plastic bowl, cover and chill overnight or for at least 7 hours until it is firmed up and you are able to shape it.


After it has had its time in the fridge, grease a 25cm round deep cake tin. Tip the dough onto a lightly floured surface and fold it on itself a couple of times to knock out the air. Divide it into 9 equal pieces and shape each piece into a smooth ball. You can do this by placing it into a cage formed by your hand against the table and moving your hand around in a circular motion, rotating the ball rapidly. Put eight of the balls around the edge of the tin and one in the centre. Don't worry if they're not yet snug - they will be when they rise.

Cover with clingfilm and leave to prove for around 2 hours in a warm place until the dough has doubled in size - I always do mine in a very low oven, barely switched on.

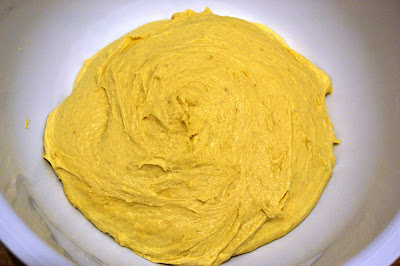
dough before proving
dough after proving

Heat the oven to 190C and when the brioche has proved, bake for 20-30 minutes or until a skewer inserted into the centre comes out clean. Bear in mind the sugar and butter in the dough will make it take on colour before it is actually fully baked. Remove the brioche from the tin and cool on a wire rack. Tear off a portion whilst still warm and board the pleasure train.


Alfiyet olsun.

Thursday, 22 November 2012

A bit of crumpet


Yesterday was a long day. One of those involving far too much public transport. Around four and a half hours on a train from London to Manchester and then back again.  The return journey included the passengers from a previous cancelled train so every seat was taken, and then some.  They blasted the heating, the train manager had an incurable bout of verbal diarrhoea, passengers were coughing and sneezing all over the shop, I was very tired, and still travelling into the late evening – it was the last place I wanted to be.  Add to that one and a half hours of London tube travel and I was more than ready to call it a day.


But there was a silver lining – today I would be working from home. While sweating it out on the train with the warm, stale air circulating the generous sniffles and coughs around the carriage (I really don’t like public transport – respect to all the folk who endure it on a daily basis), I needed a distraction, and so started to think about what I could rustle up the next day. I fancied exercising some baking skills - something I could get proving before starting work at 9am and that would be ready to eat at lunch - I then also recalled the slab of excellent French butter I had in the fridge. I quickly came to the conclusion that whatever I did make would need to be eaten warm with a knob of the soft pale gold leaving a glistening trail along its journey, paying a nod to gravity by gently cascading over whatever baked goods I would decide on. The perfect platform for the butter to take centre stage?  Why crumpets, of course.

Crumpets


Makes about 20

This is one of Paul Hollywood’s recipes from How to Bake. And as he rightly references, crumpets are in fact cooked in a pan or on a griddle, so it’s not technically classed as baking.  However, it does include yeast.  So in my eyes, this is still baking but the method of cooking is just different.

450g plain flour
1tsp caster sugar
14g instant yeast
350ml skimmed milk
350ml cold water
1 tsp salt
½ tsp bicarbonate of soda
Sunflower oil

Sift the flour into a bowl and add the sugar and yeast.  In a pan, heat the milk until just warm – about blood temperature, 37C.  

Tip If you don’t have a thermometer, you can still tell if you have the desired temperature - if you put a finger in the milk and it feels neither cold nor warm, then that will be because it is close to your own body temperature i.e. the desired temperature.

When the milk has been warmed, add the water to the milk.  Then beat the liquid into the flour to make a smooth batter.


Cover the bowl with cling film and leave it to sit in a warm place for a couple of hours.  I always use a very low oven for the proving stage of any baking, at around 40C – it’s likely to be the warmest place you’ll have in your house and means this stage happens quicker.  The batter should more than double in size before dropping back down, and will be full of holes.

Beat the salt and bicarbonate of soda into the batter with a wooden spoon, then leave to rest for 10 minutes.


Heat the largest frying pan you have (or even better, a griddle if you have one) over a low heat.  Dab a little oil onto a piece of kitchen paper and rub over the inside of some crumpet rings as well as the hot surface of the pan, then stand the rings in the pan.

Tip
Standard cookie cutters can be used for the rings.  It’s unlikely you’ll have a few of the same size, so feel free to use ones of different sizes as I did.  If one side of your cookie cutter is crimped, put the flat side against the pan.

Pour enough batter into each ring to half fill it and cook for around 6-8 minutes (depends how thick they are), until the surface is set and filled with holes.  In the picture on the left, the top and bottom crumpets are ready to be turned over.  Remove the rings and turn the crumpets over. The first side should be well browned, the second just golden. Repeat to cook the rest of the batter.


Serve straight away with butter, or leave them to cool then toast before eating.  Once cooled, these can also be frozen.

Tip
If you have trouble detaching the ring from the crumpet, use a sharp knife to slice round the edge of the crumpet and it should come away. Don’t worry if some batter is left on the ring.

Tip The more rings you use cooking each batch, the quicker the cooking process will be.  However, it’s more likely the size of your frying pan will be what restricts your speed.  If you have two frying pans, I’d get them both cooking 4 rings simultaneously to half your cooking time.


Warning - I take no responsibility if you end up gobbling each one with butter as it leaves the pan and there are none left for the people you live with. Apologies to them in advance.

Alfiyet olsun.

print button